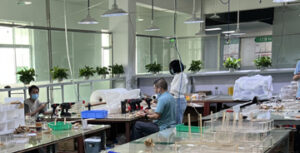
From the sleek, protective cover of a smartphone to the immense, crystal-clear panels of a public aquarium, acrylic is a ubiquitous and transformative material. But the raw, flat sheet of Poly(methyl methacrylate) (PMMA) that leaves the factory is merely a canvas of potential. The magic lies in acrylic fabrication—a sophisticated discipline that blends material science, precision engineering, and artisanal skill to transform this potential into tangible, functional, and beautiful objects.
This is not simply “working with plastic.” True professional acrylic fabrication is a technical field that demands a deep understanding of the polymer’s behavior under heat, stress, and chemical interaction. It’s about knowing precisely which cutting tool will prevent micro-fractures, how to heat a sheet to its exact glass transition temperature for a perfect bend, and how to create a chemical weld that is stronger and more optically pure than the material itself.
This definitive guide will take you beyond the surface. We will explore the science behind the techniques, dissect the engineering principles of each process, and provide the technical insights that separate amateur results from professional-grade products. Whether you are an industrial designer, a retail architect, a product developer, or simply a connoisseur of quality, this essay will illuminate the intricate art and science of shaping light.
Table of Contents
The Foundation: Understanding the Material’s Soul
Before a single cut is made, a master fabricator must understand the material they seek to command. Acrylic, or PMMA, is not a simple substance; it’s a thermoplastic polymer with a unique set of properties that dictate how it can be manipulated.
A Glimpse into Polymer Chemistry
At a microscopic level, acrylic is composed of long, entangled chains of molecules, like a bowl of microscopic spaghetti. In its solid, room-temperature state, these chains are locked in place, giving the material its rigidity. This is what’s known as an “amorphous” structure, meaning it lacks the rigid, crystalline lattice of metals or minerals.
The key to acrylic fabrication lies in understanding its nature as a thermoplastic. Unlike thermoset plastics, which undergo an irreversible chemical change when cured, thermoplastics can be softened by heat and re-hardened by cooling, multiple times, without significant degradation. This property is the foundation of all thermal forming and bending processes. The critical threshold for this transformation is the Glass Transition Temperature (Tg), which for acrylic is approximately 105°C (221°F). When heated above its Tg, the polymer chains gain enough energy to slide past one another, turning the rigid sheet into a pliable, rubber-like material that can be shaped.
The Properties That Define the Process
Every fabrication technique is designed to work with—or overcome—acrylic’s inherent properties:
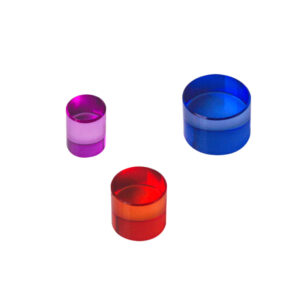
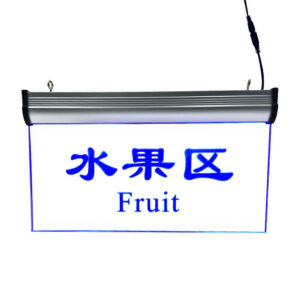
- Optical Clarity: With 92% light transmission, preserving this clarity is paramount. Every cut, bend, and joint must be executed to minimize optical distortion.
- Notch Sensitivity: Acrylic is strong, but it is “notch sensitive.” This means a small scratch, a sharp internal corner, or a rough saw cut can become a stress concentration point, making the material much more likely to crack or fail from that spot. This engineering principle informs everything from drill bit selection to design tolerances.
- Thermal Expansion: Acrylic expands and contracts with temperature changes more than glass or metal. A 1-meter sheet can change in length by several millimeters over a typical temperature range. Designs for large installations or outdoor applications must incorporate mechanical fasteners and joints that allow for this movement to prevent buckling or stress cracking.
Understanding these core principles is the difference between fighting the material and making it an ally in creation.
The Art of Subtraction: Precision Cutting Techniques
Nearly every acrylic fabrication project begins with the act of cutting a sheet to size. The goal is not merely to separate the material, but to do so with an edge quality that is clean, precise, and free of stress-inducing defects. The choice of method depends on the required precision, edge finish, and production volume.
The Digital Craftsman: CNC Routing
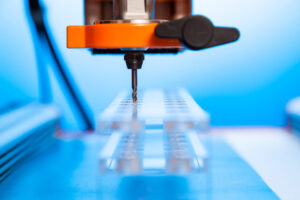
For the ultimate in precision and repeatability, Computer Numerical Control (CNC) routing is the gold standard in modern acrylic fabrication. A CNC router uses a computer-guided, high-speed spinning cutting tool (a router bit) to cut, trim, and shape acrylic sheets based on a digital design file (like a CAD drawing).
- Process: The acrylic sheet is secured to a flat bed, and the router, controlled by the computer, moves along the X, Y, and Z axes to execute the programmed cuts.
- Advantages: CNC routing offers unparalleled accuracy (often to within a thousandth of an inch), perfect repeatability for mass production, and the ability to create complex curves, internal cutouts, and beveled or rounded edges. It can also be used for engraving logos and text with precise depth control.
- Technical Considerations: Success in CNC routing acrylic depends on selecting the right bit (typically a single or double “O-flute” bit with an upward or downward spiral designed to clear chips effectively), and dialing in the correct spindle speed and feed rate. The wrong parameters can cause the acrylic to melt, gum up the bit, or leave a rough, chipped edge.
Cutting with Light: Laser Cutting
Laser cutting is a non-contact process that uses a highly focused beam of light to vaporize the material along a precise path. It’s less a cut and more a controlled sublimation.
- Process: A CO2 laser, guided by a computer, directs a beam of intense infrared light through a focusing lens onto the surface of the acrylic sheet. The material in the laser’s path instantly vaporizes, leaving an exceptionally clean cut.
- Key Advantage: The signature benefit of laser cutting is the edge finish. The intense heat of the laser melts the edge as it cuts, resulting in a perfectly smooth, transparent, “flame-polished” edge directly from the machine. This can eliminate the need for secondary polishing steps, saving significant time and labor.
- Limitations: While excellent for intricate designs and polished edges on sheets up to about an inch thick, laser cutting can induce a small amount of stress in the material along the cut edge. This can make the edge slightly more brittle and potentially susceptible to crazing if exposed to certain solvents.
Traditional Methods: Precision Sawing
While CNC and laser technology dominate high-end fabrication, precision saws still play a crucial role. Using a table saw or panel saw with the correct blade is a fast and effective way to make straight-line cuts.
- The Blade is Key: The secret to successfully sawing acrylic is the blade. The ideal blade has a high tooth count (typically 80-100 teeth for a 10-inch blade), a “triple-chip grind” (TCG) tooth profile, and a zero or negative hook angle. This configuration shaves or shears the material rather than aggressively biting into it, preventing chipping and cracking. A standard woodworking blade will almost always result in a poor-quality, damaged edge.
| Cutting Method | Edge Finish | Precision/Complexity | Speed for Simple Cuts | Ideal Application |
|---|---|---|---|---|
| CNC Routing | Matte/Machined (requires polishing) | Extremely High | Moderate | Complex 2D/3D shapes, engraving, high-volume production |
| Laser Cutting | Flame-Polished (clear) | High (for 2D) | Slow to Moderate | Intricate patterns, projects where edge polish is key |
| Precision Sawing | Rough/Sawn (requires polishing) | Low (straight lines only) | High | Sizing large sheets, initial rough cuts |
The Science of Bending: Forming and Shaping Acrylic
This is where the thermoplastic nature of acrylic truly shines. By carefully applying heat, a flat, rigid sheet can be coaxed into elegant curves and complex three-dimensional forms.
Line Bending (Strip Heating)
Line bending is the most common method for creating simple, sharp-angled bends in acrylic.
- The Process: A thin, straight heating element, typically a nichrome wire, is positioned beneath the acrylic sheet. The element heats a narrow line on the sheet to just above its Tg. Once pliable, the sheet is bent to the desired angle using a jig for accuracy and then held in place until it cools and becomes rigid again.
- The Science: The heat provides the energy for the polymer chains in a very localized area to slip past one another. The surrounding cool, rigid material acts as a natural hinge. Proper technique involves heating the sheet evenly and for the correct duration. Underheating results in a large-radius, weak bend; overheating can cause the material to bubble or scorch. The goal is to achieve a bend with a minimal, clean internal radius and no “mark-off” from the heating element.
Thermoforming: Creating Complex Geometries
Thermoforming is a family of processes used to create more complex, three-dimensional shapes. The basic principle is the same: heat the entire sheet until it’s pliable, then force it into or over a mold.
- Drape Forming: This is the simplest thermoforming method. A heated, pliable acrylic sheet is laid over a male mold and allowed to “drape” and conform to its shape via gravity. It’s used for creating gentle curves, display stands, and furniture.
- Vacuum Forming: For more detailed and complex shapes, vacuum forming is used. The heated sheet is clamped over a mold, and a powerful vacuum is applied to the space between the sheet and the mold. The atmospheric pressure then forces the soft acrylic down into every detail of the mold. This is how custom equipment covers, skylight domes, and contoured retail displays are made. The design of the mold, including draft angles and ventilation holes, is a critical engineering challenge to ensure a uniform and flawless final part.
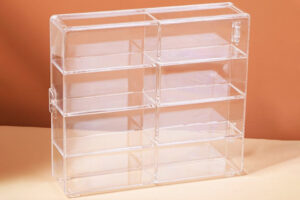
The Art of Addition: Joining and Assembly Techniques
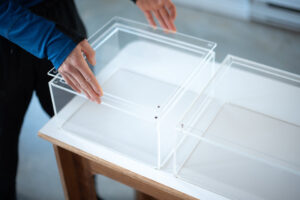
Creating a simple bent stand is one thing; constructing a five-sided museum vitrine or a complex retail fixture requires joining multiple pieces of acrylic together. The method used for joining is critical to the final product’s strength and aesthetic.
The Invisible Bond: Solvent Welding
This is the most elegant and widely used method for joining acrylic to acrylic. It is not gluing; it is a chemical process that creates a molecular bond.
- The Science: A watery-thin solvent (often containing methylene chloride or a similar chemical) is applied to the edges of the pieces to be joined. The solvent temporarily dissolves the surface of the acrylic, allowing the long polymer chains from both pieces to intermingle. The solvent then evaporates, and the chains become permanently entangled, fusing the two pieces into what is, for all intents and purposes, a single, solid piece of acrylic.
- The Technique: For this to work, the edges must be perfectly machined—flat, smooth, and square. The most common method is capillary action, where the pieces are held firmly in place and a needle-tipped applicator is used to run a bead of solvent into the joint. The solvent is drawn into the tight-fitting joint by capillary action, creating a bubble-free, perfectly transparent, and incredibly strong bond.
Stronger Connections: Adhesive Bonding
When a gap needs to be filled, or when bonding acrylic to a different material (like wood or metal), structural adhesives are used. These are typically two-part reactive epoxies or acrylic-based cements that cure to form a hard, strong bond. While these adhesives can be stronger than the acrylic itself, the resulting seam is visible, unlike a properly executed solvent weld. The choice between solvent and adhesive is a trade-off between aesthetic purity and gap-filling capability.
The Final Polish: Finishing for Perfection
A fabricated part is not a finished product until it has undergone the final finishing processes. This is what elevates a piece from functional to exceptional.
Achieving Optical Clarity: Edge Finishing
An edge left by a saw or CNC router is clean but opaque and machined. To restore the signature crystal clarity of acrylic, this edge must be polished.
- Sanding: The process starts with sanding the edge, typically wet sanding with progressively finer grits of sandpaper (from 220 up to 600 or higher) to remove all machine marks.
- Buffing: The sanded edge is then brought to a high-speed buffing wheel. A coarse cutting compound is first used to remove the fine sanding marks, followed by a very fine polishing compound that brings the surface to a brilliant, glass-like shine. This is the most labor-intensive method, but it produces the highest quality, most optically perfect edge.
- Flame Polishing: As an alternative to buffing, flame polishing uses a specialized torch (often hydrogen-oxygen for a clean, hot flame) passed quickly over the sanded edge. The intense heat melts the very top layer of the acrylic, which flows into a smooth, clear, high-gloss finish. This requires immense skill, as holding the flame in one spot for even a fraction of a second too long can burn the material and induce stress.
Safety and Best Practices: The Fabricator’s Code
Professional acrylic fabrication is a safe practice when proper protocols are followed. The material itself is non-toxic in its solid state, but the processes used to work it have inherent hazards.
| Hazard/Process | Potential Risk | Personal Protective Equipment (PPE) | Safety Protocol |
|---|---|---|---|
| Cutting (Saw/CNC) | Flying chips, dust, kickback | Safety glasses, hearing protection | Use sharp, correct blades/bits. Use guards and push sticks. Ensure proper dust extraction. |
| Heating/Bending | Burns, material ignition | Heat-resistant gloves, safety glasses | Never leave heating elements unattended. Monitor temperature closely. Keep flammables away. |
| Solvent Welding | Chemical exposure, fumes | Nitrile gloves, safety glasses/goggles, respirator | Work in a well-ventilated area. Avoid skin contact. Keep solvent containers sealed. |
| Flame Polishing | Burns, fire, gas cylinder handling | Safety glasses, leather gloves | Check for gas leaks. Keep a fire extinguisher nearby. Never polish near flammable materials. |
| General Handling | Scratches, sharp edges | Gloves (cotton or nitrile) | Keep protective masking on as long as possible. Store sheets flat or on an A-frame rack. |
A commitment to safety is the hallmark of a professional operation. Understanding and mitigating these risks is as important as mastering the fabrication techniques themselves.
Frequently Asked Questions (FAQs) about Acrylic Fabrication
Q1: What is the difference between acrylic, Plexiglas, and Lucite? A: Acrylic is the generic chemical name for the polymer Poly(methyl methacrylate) (PMMA). Plexiglas and Lucite are well-known brand names for this same material, much like Kleenex is a brand name for facial tissue. While formulations can vary slightly between manufacturers, they are all fundamentally acrylic.
Q2: Can I glue acrylic with super glue (cyanoacrylate)? A: You can, but you absolutely shouldn’t for any structural or aesthetic application. Super glue creates a very weak, brittle bond on acrylic. More importantly, the fumes and the chemical itself will almost instantly cause “crazing”—a network of tiny cracks—to appear on the acrylic surface, permanently damaging it. Always use a proper solvent cement or structural adhesive.
Q3: Why did my acrylic sheet crack when I tried to drill a hole in it? A: This is a classic example of notch sensitivity. Standard metal drill bits are too aggressive; they bite into the acrylic and cause it to chip and crack. You need to use a special drill bit designed for plastics, which has a sharper point (60-90 degrees) and a zero-rake angle on the cutting edge. Drilling slowly, without excessive pressure, and using a coolant (like water) can also help prevent cracking.
Q4: How thick of an acrylic sheet can be laser cut? A: This depends entirely on the power of the laser cutter. A low-power hobbyist laser (40W) might struggle with anything thicker than 1/4 inch (6mm). A high-power industrial laser (150W or more) can cleanly cut acrylic that is 1 inch (25mm) thick or even more, though the edge quality may be slightly tapered on thicker materials.
Q5: What is the best way to clean a finished acrylic product? A: The best method is the simplest: use a soft, clean microfiber cloth with a solution of mild soap and lukewarm water. Gently wipe clean and then dry with another clean microfiber cloth. Never use paper towels (they are abrasive) or cleaners containing ammonia (like Windex), alcohol, or other harsh solvents, as they can cause crazing and damage the surface.
Conclusion: From Raw Material to Refined Reality
Acrylic fabrication is a field where science serves art, and engineering enables design. It is a process of transformation, taking a humble polymer sheet and, through a series of precise and calculated operations, turning it into an object of value, utility, and beauty. From the initial CAD drawing to the final, gleaming polish, each step requires a fundamental respect for the material’s properties.
By understanding the molecular dance of thermoplastics, mastering the physics of cutting and bending, and applying the chemistry of bonding, a fabricator can create virtually anything imaginable. The techniques and principles outlined here are the building blocks of this craft—a craft that continues to shape our visual world, one perfectly fabricated piece at a time.